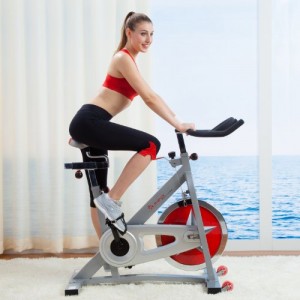
Setting Up For A Spinning Cycle
Your ads will be inserted here by
Easy Plugin for AdSense.
Please go to the plugin admin page to
Paste your ad code OR
Suppress this ad slot.
Setting Up For A Spinning Bike
So, you have bought a spinning machine, or maybe even you are on the verge of reaching for your wallet and heading to the local sports store, or you have that cup of coffee by the monitor all ready to do that on-line shopping for a suitable machine you have been promising yourself.
Either way, this quick post will highlight some of the main areas of adjustment these spinning cycles (and regular road bikes as well for that matter). The adjustment is important to get the most out of the effort you will put into your spinning as well as avoiding any injury.
There are usually three main adjustments :
- Saddle height (up and down)
- Saddle position (forwards and backwards)
- Handlebar height (up and down)
Some of the higher end models may even have a smaller adjustment that will allow movement forward and backwards of the handlebars.
Saddle Height Adjustment
Stand upright beside the bicycle, facing forward with the seat by your side. Make sure you are wearing the shoes you will be using to ride the bike. Lift the leg closest to the bike until your knee is at the height of your hip, and your foot is hanging naturally pointing towards the ground. Try to keep your hips parallel and not cocked on the raised leg side. You will feel your hip bone push out a little. The height of this hipbone should be the starting point for the height of the middle of the saddle. Getting this adjustment correct will save you from sore and aching knees after even a short time riding.
Saddle Position (Forwards / Backwards)
Position yourself on the bike, sitting on the now correctly positioned saddle. Start to pedal slowly forwards. Imagine as the pedal rotates, that the pedal is rotating around the outside of a clock. For this exercise, you only need to worry about one side. As your feet are at the top of the pedal stroke (knee most bent), this will be 12 o’clock. Rotate one quarter of a turn and the position will be 3 o’clock. In this 3 o’clock position, your knee should be positioned directly over the top of the pedal and your lower leg should be almost perpendicular to the ground. This will allow you to exert the maximum force into the pedal stroke, in turn maximizing power output and calories expended.
Handlebar Height Adjustment
Your ads will be inserted here by
Easy Plugin for AdSense.
Please go to the plugin admin page to
Paste your ad code OR
Suppress this ad slot.
This adjustment is mainly an adjustment for comfort. On an indoor spinning cycle you will not have to worry about any wind resistance as you might for an outdoors road bike, so it makes a little more sense to have the position of the handlebars up a little higher. This adjustment may only be possible after you have been sitting and pedalling for a little while. Ideally, you should only be lightly resting your hands on the handlebars – more of an assistance to balance rather than significantly supporting any of your weight. Leaning too heavily on the handlebars will cause your arms to tire easily and can result in pins and needle feelings in your hands and finger tips after little while.
Footwear for Spinning and Cycling
I mentioned a little earlier about shoes. While not exactly one of the most important setup considerations for any spinning or cycling, suitable footware will have an impact on how smoothly your cycling effort will go.
For any spinning and cycling, it is best to have shoes that have a firm sole. Proper cycling shoes have very stiff soles to assist with the power transfer to the pedal stroke. For beginner cyclists and those contemplating the first attempts at a spinning class, training shoes or sneakers will suffice.
To stop your feet from slipping off the pedals, most spinning bikes will have pedals that have a cage (sometimes called traps) that you can insert your shoe into with some sort of strap that can be adjusted to secure your shoe. Usually, the underside of these pedals with the cages installed will have some time of cleat trap. To utilize this side of the pedal, you would need to have custom cycling shoes with a SPD cleat installed. Another name for these SPD cleats is mountain bike shoe cleats. The cleats on the bottom of your shoe slot into the attachment on the pedal, thereby securing your foot to the pedal. To remove your shoe from the pedal, simply turn your ankles away from the bike and your shoe will pop away from the pedal.
If you are using a road bike, make sure you have a few practises getting your feet out of the pedals while you are holding on to something before heading out on the road. It takes a little practise and thinking ahead to be able to get your shoes free and put your feet down when you need to stop.
All you need now is motivation, a water bottle, a small towel to wipe away that sweat that will happen and some tunes and maybe some company in the form of a spinning class and you are set on your road to an excellent means of improving your health and general fitness and definitely a calorie burning activity.


